Setting The ID For Yamaha Assembleon CLi Feeder Exchange Carriages

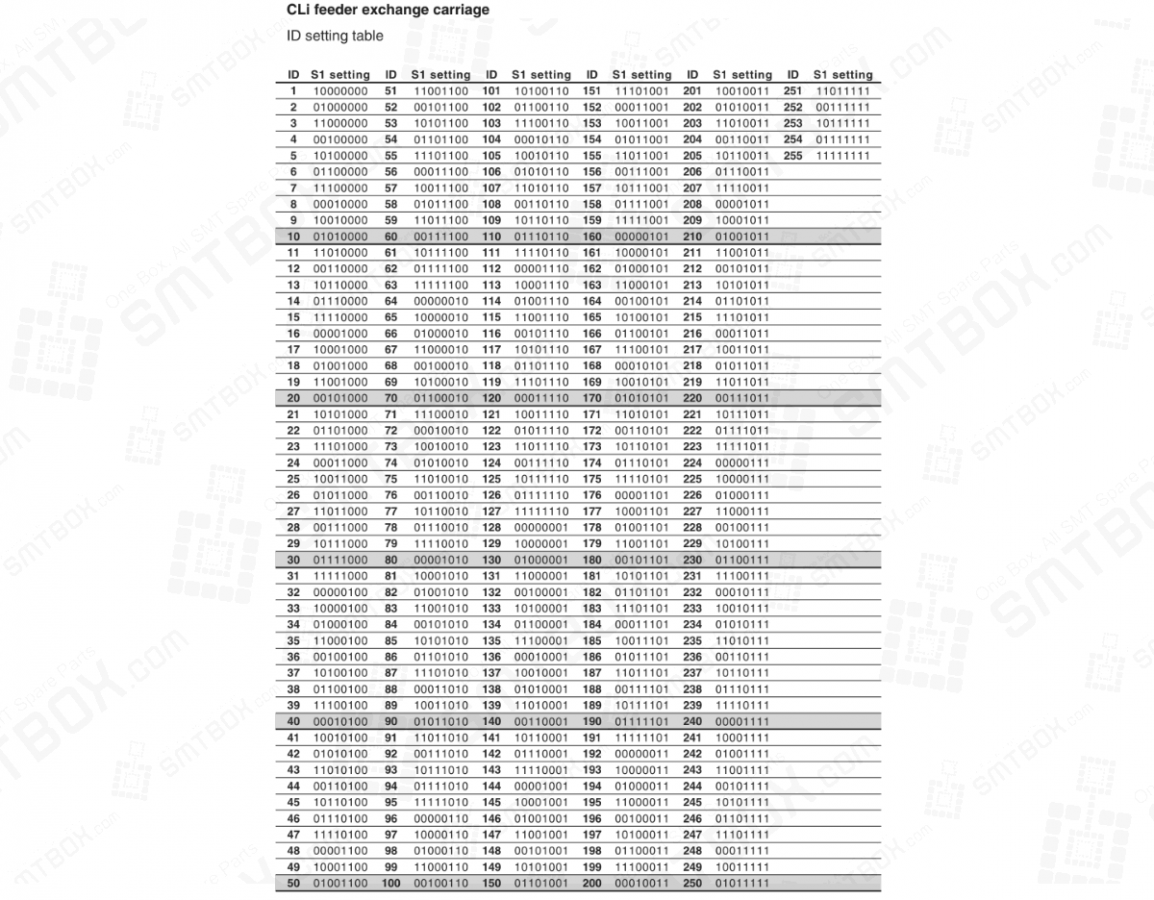
Id Setting Table Of Yamaha Assembleon Cli Feeder Exchange Carriage
Troubleshooting Summary:

Having issues with Setting The ID For Yamaha Assembleon CLi Feeder Exchange Carriages? Read our step-by-step SMT maintenance solution below. If you require replacement feeders, nozzles, or sensors, contact SMTBOX for OEM-compatible parts.

When using CLi feeder exchange carriages, you must set their own ID as explained below. A list of ID settings is also shown.

1. Disconnect the feeder exchange carriage from the surface mounter.

2. Remove the front cover. Using a Phillips (+) screwdriver, remove the four screws securing the front cover (with a clear, plastic window).
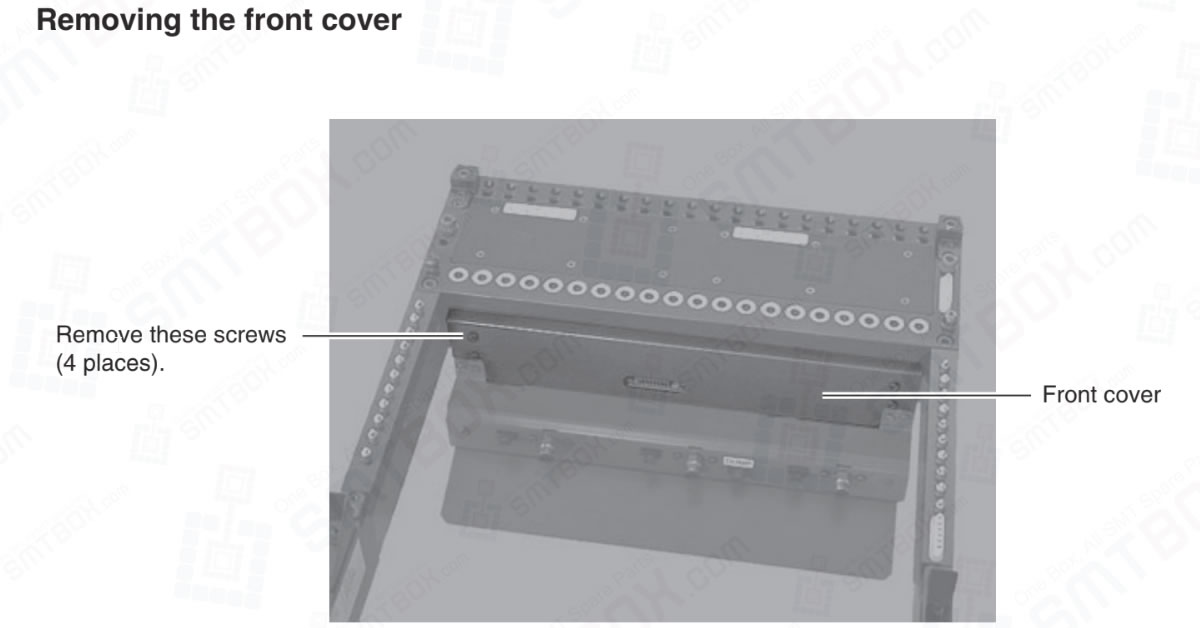
Remove These Screws (4 Places) To Removing The Front Cover of CLi Feeder Exchange Carriages

3. Set the ID for the feeder exchange carriage. Use the DIP switch (S1) to set the ID while referring to the table on the next page. Reattach the front cover after setting the ID.
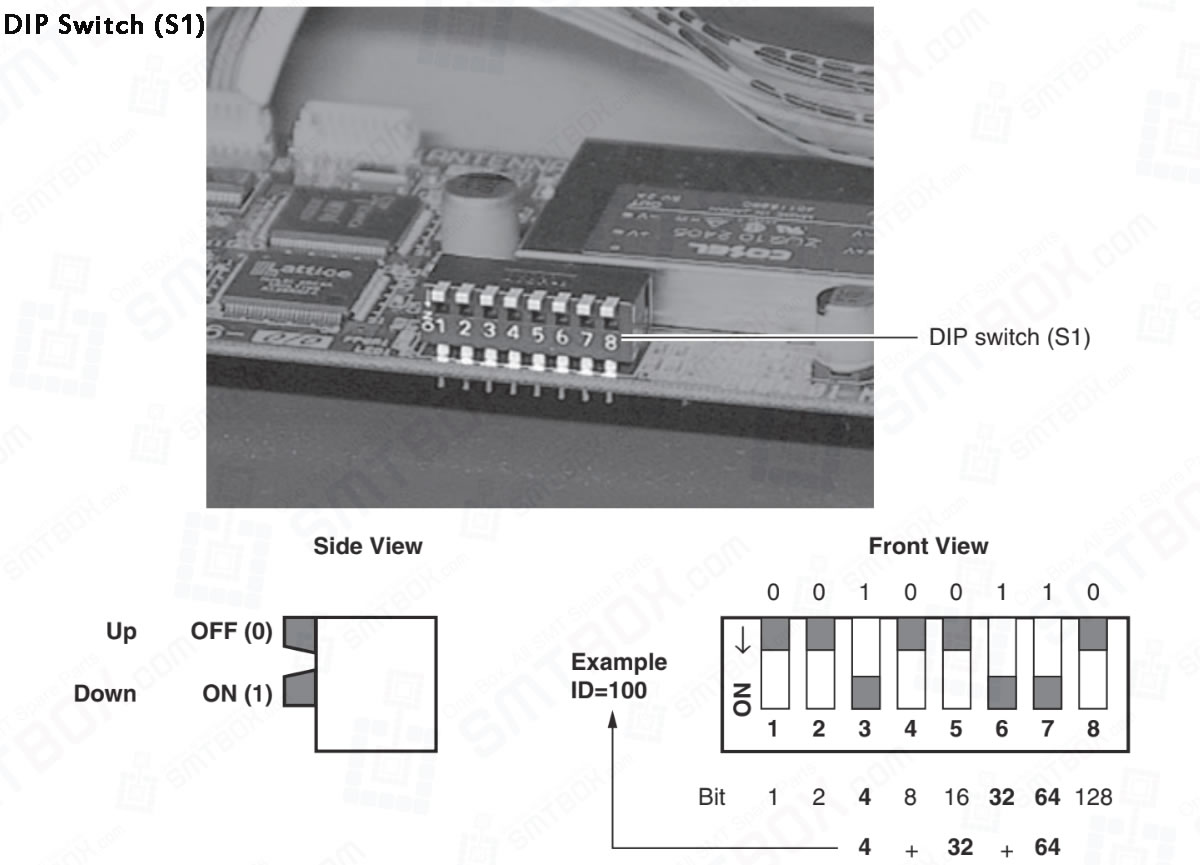

Set the ID for Yamaha Assembleon CLi Feeder Exchange Carriage

SMTBOX Editorial & Engineering Team
Written by: SMTBOX Editorial & Engineering Team

Our editorial team consists of senior SREs, mechanical engineers, and SMT assembly specialists with over 15 years of industry experience in PCB assembly line optimization. All technical articles are reviewed and verified for mechanical and electronic compatibility before publication.

SMTBOX Assistant
Search part numbers & models

SMTBOX Assistant

Hello! I'm your AI assistant. Tell me the machine model or part number you're looking for.
Your subscription could not be saved. Please try again.
Your subscription has been successful.
This site is protected by reCAPTCHA and the Google Privacy Policy and Terms of Service apply.