Having issues with 2.1.2 Installing the Machine (Leveling) for Panasonic Radial Lead Component Insertion Machine RHS2B? Read our step-by-step SMT maintenance solution below. If you require replacement feeders, nozzles, or sensors, contact SMTBOX for OEM-compatible parts.
Procedure
1. Set machine main body accurately on the reference points.
2. Loosen lock nuts securing the adjust bolts.
3. Set the height from floor to the transfer belt surface between 900 to 910 mm.

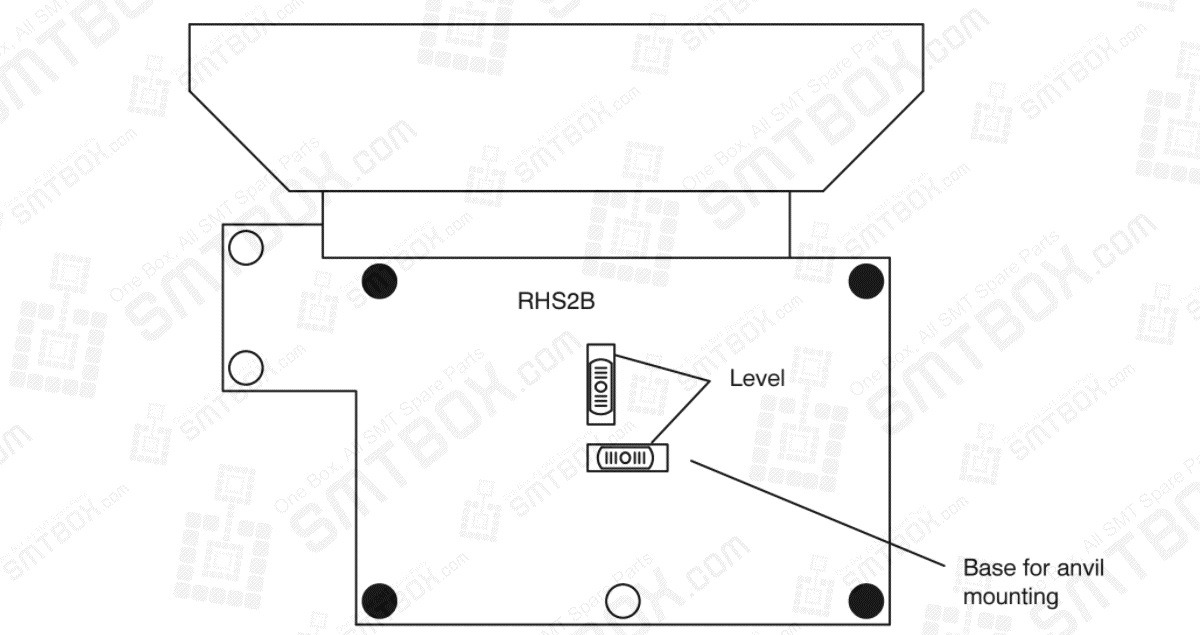
4. Clean the top of the table with waste cloth to remove any foreign substance. Check X and Y directions and judge the current level (against 900?910 mm) to make the temporary level.
5. Make the temporary level so as to check precision of the level. Becomes the basis of leveling.
REFERENCE
Turn the level by 180 and check precision of the level with the bubble position in relation to the scale.

6. Make the leveling of X direction, and then the leveling of Y direction.
7. With leveling of Y direction, recheck leveling of X direction. (If no leveling of X direction has been made, fine?adjust the adjust bolts so as to make both X/Y leveling.)
8. Lock the adjust bolts (legs shown with a black circle). (At this time, check leveling of XY direction. If in error, adjust the adjust bolt on the front side, which facilitates leveling.)
9. Lock also the other adjust bolts (legs shown with a white circle) by adjusting lightly.
Our editorial team consists of senior SREs, mechanical engineers, and SMT assembly specialists with over 15 years of industry experience in PCB assembly line optimization. All technical articles are reviewed and verified for mechanical and electronic compatibility before publication.